

Masterclass with Jay Verluis
The Daz Studio Masterclass is a 3-part series of courses that explore Daz Studio features, essential tips and tricks, and expert knowledge for creators of all skill levels.
Ready, set, render!
Beginner Course
A comprehensive intro to Daz Studio for beginners and a great refresher course for returning artists.
Daz Studio Masterclass Introduction
Description
Welcome to the course!
Chapters
- Daz Studio Masterclass Introduction
- Part 1: Tour of the User Interface
- Part 2: Viewport Controls
- Part 3: Moving Objects in the 3D World
- Part 4: Navigating Large Environments
- Part 5: Viewport Draw Styles
- Part 6: Filament and Creating a Default Startup scene
- Part 7: Scene Tab, Hierarchies, Groups, and Empties
- Part 8: Smart Content vs Content Library
- Part 9: Loading Figures, Fitting Clothing
- Part 10: Working With Custom Libraries
- Part 11: Loading Objects Off Center
- Part 12: Saving Scenes, Props, and Other Items
- Part 13: Content Licensing and Commercial Use
- Part 14: Introduction to Lighting and Headlamps
- Part 15: Lighting Part 1: Global Illumination With HDRIs
- Part 16: Lighting Part 2: The Power of Point Lights
- Part 17: Lighting Part 3: The Power of Spotlights
- Part 18: Lighting Part 4: Creating Your Own Mesh Lights
- Part 19: Cameras, Framing, Render Dimensions, and Local Dimensions
- Part 20: Depth of Field
- Part 21: Render Settings Overview for NVIDIA Iray
- Part 22: Putting It All Together: Creating a Portrait From Start to Finish
Intermediate Course
Dive into the history of Genesis figures, create custom characters, and fine-tune your renders.
Part 23: Brief History of Victoria and Genesis Generations
Description
In this video, I’ll give you the “origin story” of Daz Studio and Poser, as well as the figure generations we’ve been working with until today. This will give you an overview of why things are the way they are and how they all came to be. I’ll delve deep into the different versions of Genesis, their pros and cons, and their base compatibilities.
- A Brief History of Poser on PoserHistory.com
- Dartanbeck’s history of the Victoria Figures
- Zygote Medical Assets
- Victoria 4.2
- Michael 4
- Victoria 5 (based on Genesis 1)
- Victoria 6 (based on Genesis 2)
- Victoria 6 HD (based on Genesis 2 with higher resolution)
- Victoria 7 (based on Genesis 3)
- Victoria 8
- Victoria 8.1
Resources
Chapters
- Part 23: Brief History of Victoria and Genesis Generations
- Part 24: Custom Characters, Shaping, and Parameters Tab
- Part 25: Subdivision Implications
- Part 26: Posing Tools
- Part 27: Blending Expressions With Puppeteer
- Part 28: Expressions and Face Controls
- Part 29: Adjusting Clothing
- Part 30: Fitting Clothing With dForce for Standing Poses
- Part 31: dForce Clothing and Sitting Poses
- Part 32: Using Hair Products
- Part 33: Using Accessories
- Part 34: Shaders and Material Presets
- Part 35: Fixing Poke-Through With the Geometry Editor
- Part 36: Using External Tools
- Part 37: Using Hexagon
- Part 38: Using ZBrush
- Part 39a: Using Blender Vertex Tools
- Part 39b: Using Blender Sculpting Tools
- Part 40: Fitting and Adjusting Clothing With Marvelous Designer
- Part 41: Using the Push Modifier
- Part 42: Creating a Portrait From Scratch
Advanced Course
Explore advanced topics related to post-production work, scene optimization, and more.
Part 43: Tone Mapping
Description
Tone Mapping is part of the Iray render engine, allowing us to make some adjustments that will occur during the render phase in Daz Studio. Technically, Tone Mapping is a post-production pass, letting us make crucial changes to how our images are rendered. I’ll show you how to adjust the contrast, exposure, and color balance of your images, as well as a quick way to add vignettes.
Most of these adjustments are often faster to make in post production, but Tone Mapping can be a great tool for inspiration and guidance during the image creation phase.
Jump to time
- [00:00] Post Production and Tone Mapping Overview
- [04:00] Adjusting Gamma and Saturation
- [07:40] Crushing Blacks and Burning Highlights
- [13:50] Changing the White Balance
- [15:00] Adding a Vignette
- [17:00] How Tone Mapping works in principle
- [20:50] Adjusting Exposure
- [25:30] Disadvantages of Tone Mapping
Chapters
- Part 43: Tone Mapping
- Part 44: Using Photoshop and Correction Layers
- Part 45: Vignettes in Photoshop
- Part 46: Replacing and Creating a Background in Photoshop
- Part 47: Exporting From Photoshop
- Part 48: Lighting Products
- Part 49: Scene Optimizer
- Part 50: Scene Tools
- Part 51: Pose Architect
- Part 52: Mesh Grabber
- Part 53: Batch Rendering
- Part 54: Daz Studio Beta
- Part 55: Where To Go From Here

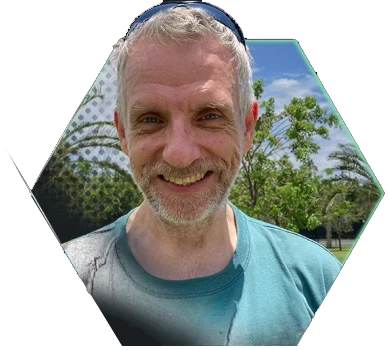
About the Instructor: Jay Versluis
Jay Versluis has been using Daz Studio since 2006. He is passionate about sharing his knowledge on YouTube and his various websites. In his previous day job as a broadcast professional, he worked on live events for MTV, CNN, BBC, Cartoon Network, and IMG Media.