-
Generation 3 Aiko and Hiro Appreciation Thread
richardandtracy said:
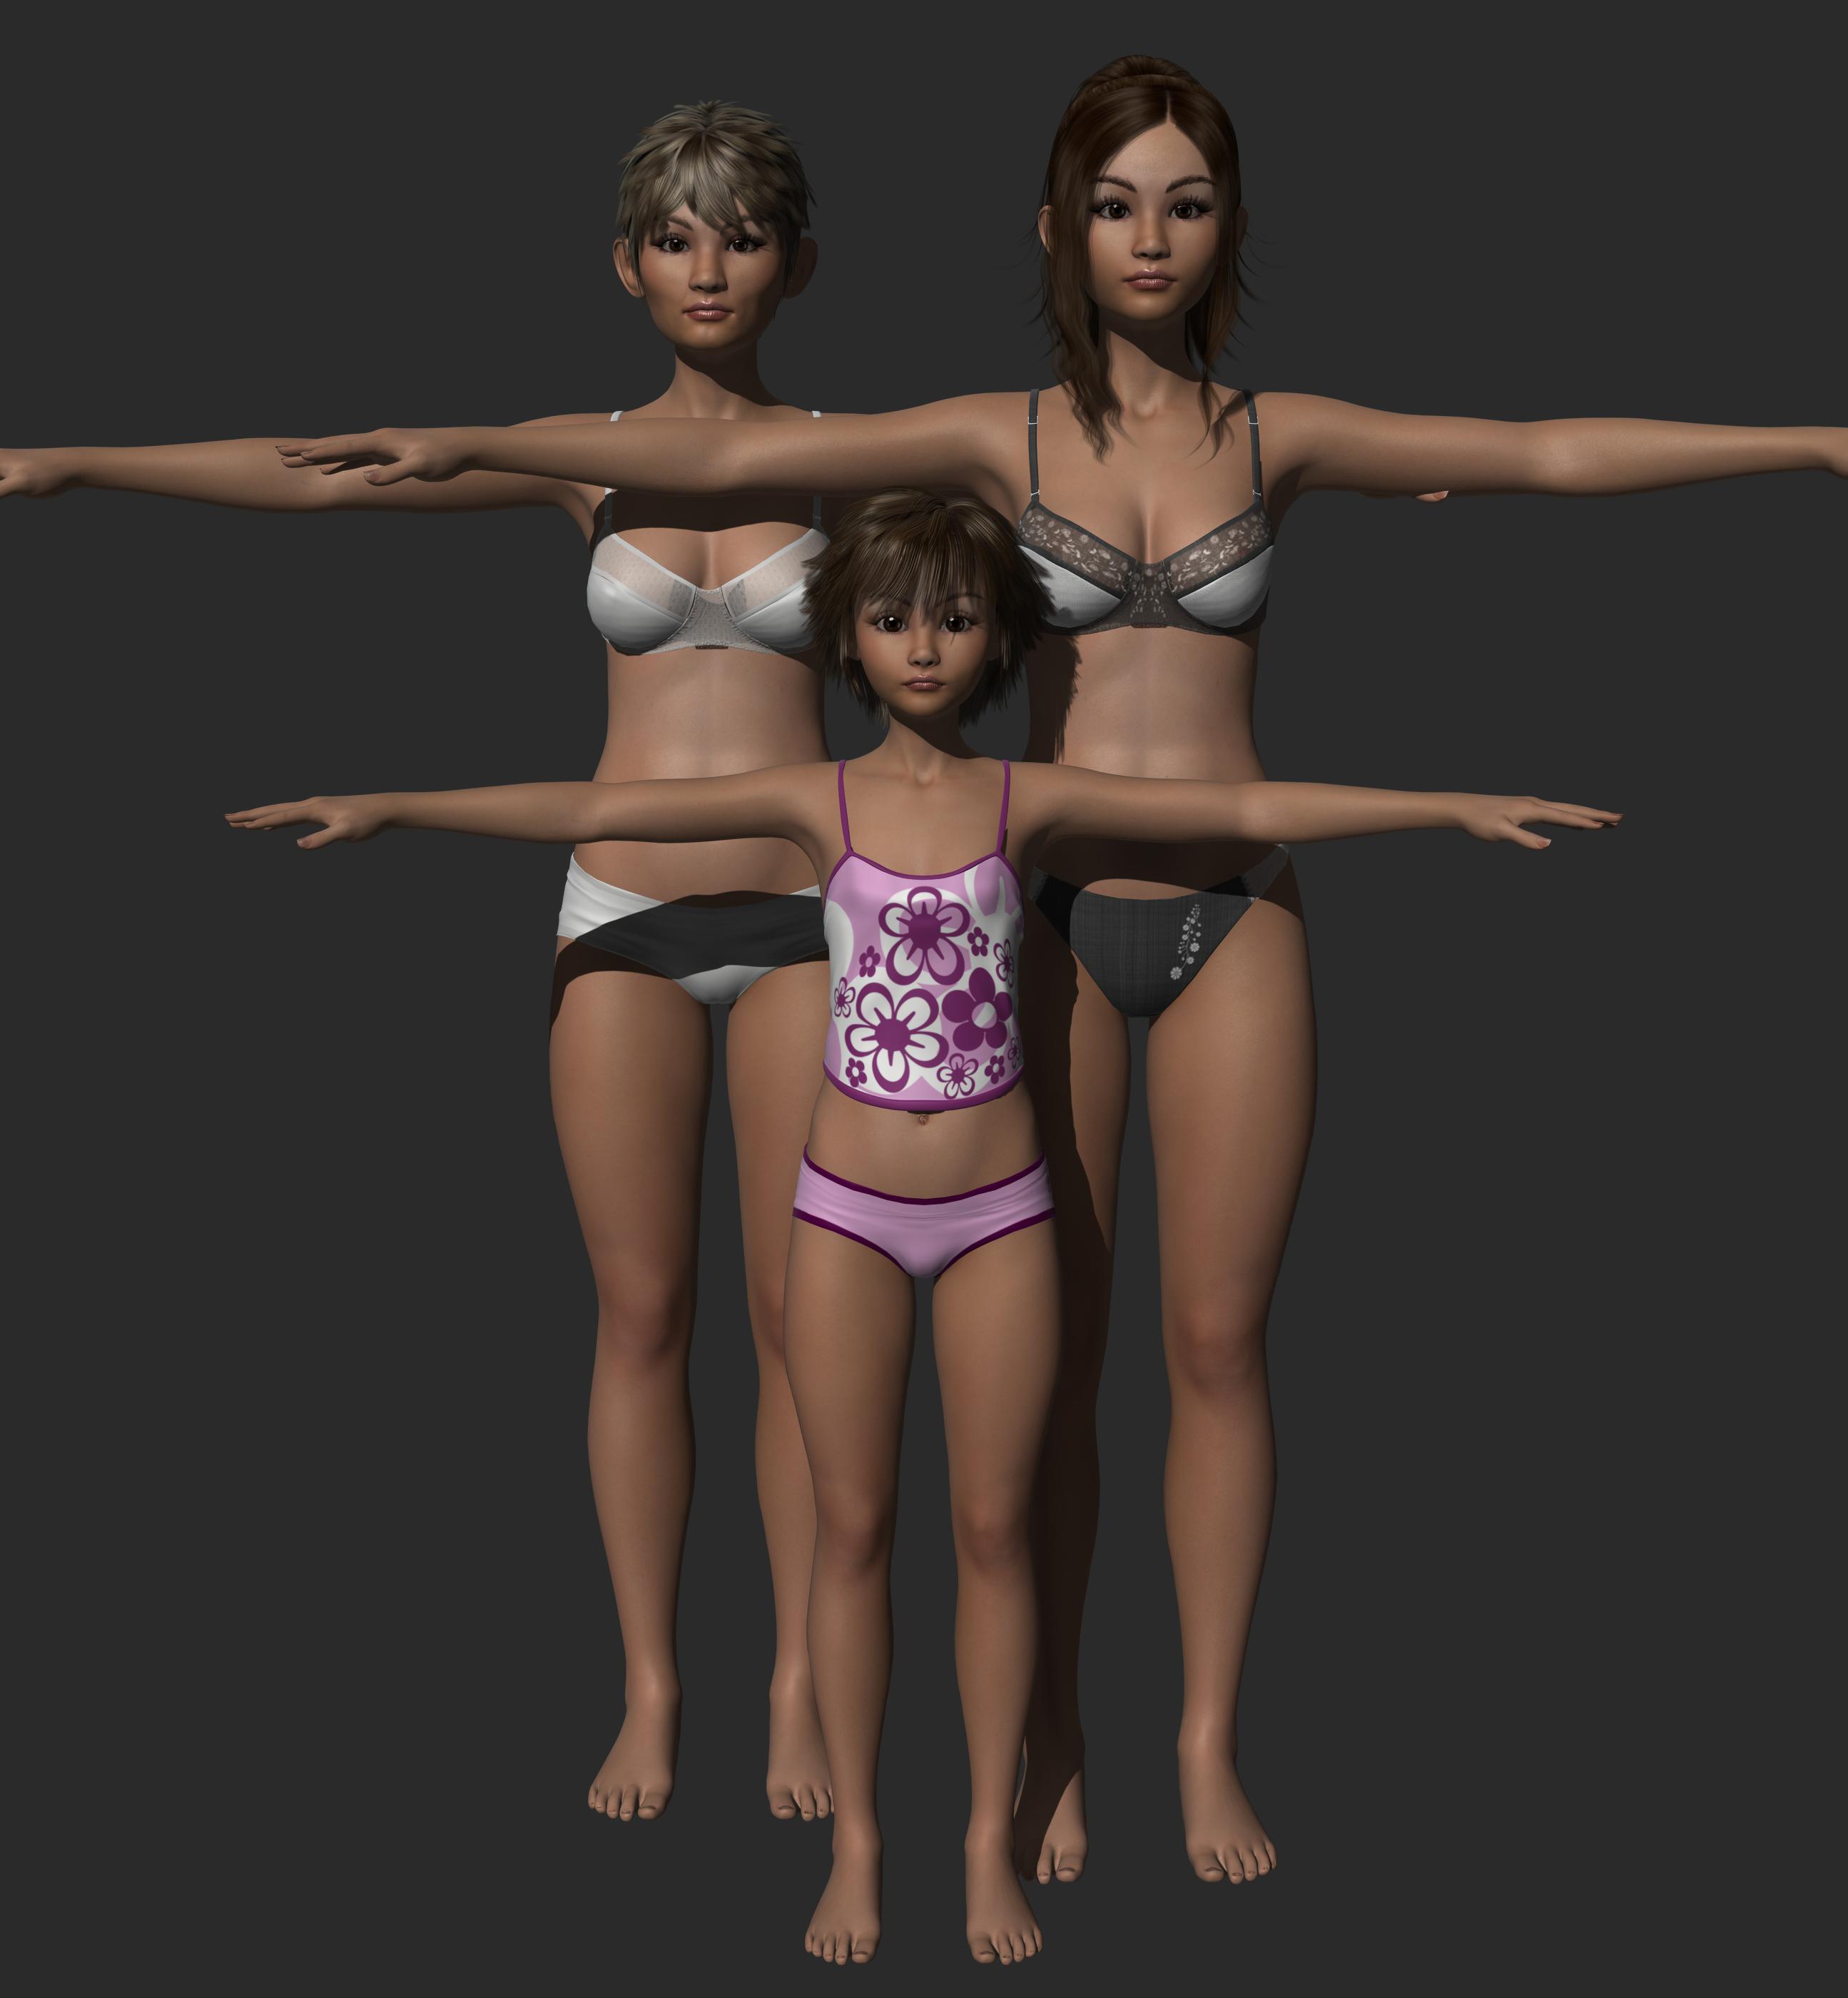
Looks good. I'm occsionally a bit uncomfortable with Thorne's characters fae or not - some look a bit 'Lolita' for me, but you've done a good maturation job on Sarina there.
Regards,
Richard
Thanks!
Yeah, that was Aiko's niche back then.
I have tried to use the other generation 3 females several times but I'm always disappointed by their lack of versatility compared with Aiko (not necessarily their fault, if they had morph expansions similar to A3's I don't have them), and at this point I've use Aiko to fill most of their roles.
An old age progression test from 2019 I did using Mulberry.
-
Face Transfer Confusion
Hello all! I am a bit confused by Face Transfer — or maybe not. Is the following correct?
- There is a free version built into Daz Studio that allows you to save up to 3 face transfers without a watermark.
- You use Face Transfer (1) for Genesis 8 and Face Transfer 2 for Genesis 9.
- The paid versions in the store are exactly the same but remove the 3-figure save cap.
Is that right?
-
Let's appreciate/discuss today's new releases - more ongoinger thread
felis said:
Quick morph. I didn't match it to an open shape.
Cool! What did you do this with?
-
The dForce Hair Thread
Squishy said:
e: that full FBX export was taking so long and I wasn't sure if it was hung or not so I interrupted it, I managed to export a 100k vertex part of the original 1.3 million vert hair and while that took quite a long time (something like 10 minutes) it completed OK and re-imported back into D|S, so trying again with the whole model with a silly obvious morph applied and will see if it can be imported as a morph target.
I let the Cinema side export run for two hours and gave up, whether it works or not I am not interested enough to give it that much time between each attempt.

-
Let's appreciate/discuss today's new releases - more ongoinger thread
Quick morph. I didn't match it to an open shape.
-
Exporting anatomical elements morphs
rasmusazu said:
To anyone still running into the problem of being unable to export elements such as genitalia or similar accessories, I think I've found how to do it. Though its not completely what we may want.
For some reason.. If you dont choose "Geometry Editor" under tools before exporting the model, the accessory wont show up in the export window and therefore you wont be able to export the morphs connected to it.
This of course creates the problem that, if you're trying to export your model WITH genitalia you will end up with a layer under the genitalia. This can of course be fixed by hiding the area, but the genitalia simply wont adjust to the body properly if you have Geomtry Editor selected during exportation.
Its not a perfect solution, but it works. It has allowed me to export a model with morphs for both the body and the genitalia.Well, I'm still working with Gen 3 models and still have thie merge bug in Daz 4.21. I couldn't find a version before Daz 4.12 which introduced this bug. It's been like 7 years since my original post and this bug still has not been fixed, it's amazing.
Anyway, I used your solution this time and it worked without issue. The downside like you said is having the genitals in a separate mesh and duplicating lots of morphs. Daz is also not smart enough to not export unneeded morph on the genitals, like face morphs... Amazing too... So you'll have to have one morph export file to export female object first then use another morph file to export genitals. And use an invisible material on the original genitals which will now still show, not a big deal but still another mess to add on top of the complex video game creation process :/
-
The dForce Hair Thread
Cinema R18's OBJ exporter will read splines in, but won't write them out again (reading the exported OBJ file it contains no vertex data). Also the R18 FBX exporter seems to be having a hard time writing the 1.3 million vertex hair I'm working with back out to FBX, it's sitting at 0% for some time but I'll leave it alone and see if it either fails or succeeds or what.
e: the Cinema OBJ importer has an option for "lines", but the exporter does not (although the FBX exporter has "curves" and seems to work for small splines)
e: that full FBX export was taking so long and I wasn't sure if it was hung or not so I interrupted it, I managed to export a 100k vertex part of the original 1.3 million vert hair and while that took quite a long time (something like 10 minutes) it completed OK and re-imported back into D|S, so trying again with the whole model with a silly obvious morph applied and will see if it can be imported as a morph target.
-
Morphs, textures, oh my. Variety needed
OK, speaking of morphs, and of M3D’s latest character … are there any morph packages for either G9 or G8M that can “straighten out” a pinched (side to side) nose like M3D Frank’s? I’ve had no success with this. Obviously I can just use a different character, or apply a skin to a different underlying shape, and all that. This is more of a “theoretical” question — I’d like to better understand how to get the results I envision, rather than just spinning dials until it looks “right.”
-
Where is the scene?
Artini said:
Please also look at the answer by ARealiti in the thread:
https://www.daz3d.com/forums/discussion/718061/sending-a-set-to-unity#latest
So things must have changed either with the new Daz or the new Unity (6). Even though i made everything but the original instance of the first prop i wanted to transfer over invisible, everything came over. they became prefabs in Unity. Right now I'm working thru placement and getting them textured with the Unity mesh (if that's the right way to put it). i really wish Daz would get involved and update us on these changes.
-
Mesh grabber for Daz 2025 Alpha?
Squishy said:
Richard Haseltine said:
The plug-ins that were purchased by Daz and developed into the Premier plug-ins will not be getting updates other than to the Premier vesions, I'm afaid. they will of course work in DS 4, and aside from needing to bake the Mesh Grabber Modifier to a morph or shape (and render Queue, obviously) their effects should then be savable and openeable in DS 2025.
this sounds pretty explicit to me
Daz bought what was supposed to be Mesh grabber 4, as well as a bunch of other ManFriday plugins. Those plugins now belong to Daz, and Daz can decide whether they will get a DS2025 update (the older standalone plugins won't, only the Premier plugins based on them will).
However Daz didn't buy Mesh grabber 3, which is still sold in the store as a PA products. ManFriday still owns them, and can decide whether to update them for DS2025 or not.
-
Mesh grabber for Daz 2025 Alpha?
Richard Haseltine said:
The plug-ins that were purchased by Daz and developed into the Premier plug-ins will not be getting updates other than to the Premier vesions, I'm afaid. they will of course work in DS 4, and aside from needing to bake the Mesh Grabber Modifier to a morph or shape (and render Queue, obviously) their effects should then be savable and openeable in DS 2025.
this sounds pretty explicit to me.
-
The dForce Hair Thread
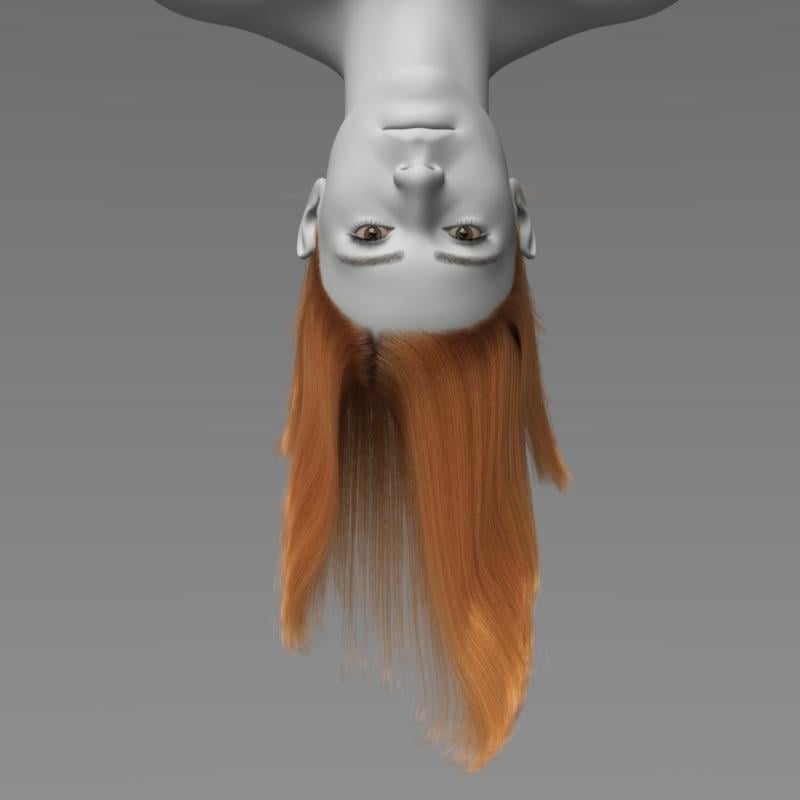
Oh, I remembered another trick. If you simulate with the Geometry Editor tool selected, the hair seems to lose its baked in stiffness and will drape a lot. That's really the best way to make upside down morphs or droopy wet looks, I think. You don't even need a modeler for this. Just simulate, export and import to morph loader pro (or use MorphMaster, which is fabulous).
Edit: And always select another tool, like the Node Selection Tool, before Iray rendering. The dForce hairs won't render all the strands with the Geometry Editor (or Mesh Grabber, etc.) tools selected.
-
The dForce Hair Thread
Squishy said:
No, the geometry is there, which is why you can export it back out to OBJ. They've had 8+ years to add features to the user side to make this easier to work with if they wanted to.
e: the geometry is there in the form of vertex data, the same as polygons, just with no face data.
barbult said:
With Geometry Editor tool active, you can export the "curves" hair, move the vertices in a modeler, and with the Geometry Editor still active, import your modified OBJ to DS to create a morph. You do not have to be a PA to do that. I have made several morphs for PA dForce (strand-based) hair products that way. I have posted this in the forums a couple of times at least. You can even simulate in DS and export that and reimport it as a morph. The key is to have the Geometry Editor tool active during export and import. There can be millions of vertices in some of these hairs, so the morph creation can take some time.
This is a cool trick, never would have thought to try something like this. Thanks! Is there documentation on details of this or anything? What else can be done?
e: being able to make a few morph targets really would be great, e.g. with that particualr hair I love the way it looks from the front but not so much from the back. would be nice to be able to customize!
I don't know of any documentation on this. I don't even remember how i learned it. I may have discovered it by accident or maybe someone else told me. I started doing it years ago, starting when Neroli Hair was released.
-
The dForce Hair Thread
No, the geometry is there, which is why you can export it back out to OBJ. They've had 8+ years to add features to the user side to make this easier to work with if they wanted to.
e: the geometry is there in the form of vertex data, the same as polygons, just with no face data.
barbult said:
With Geometry Editor tool active, you can export the "curves" hair, move the vertices in a modeler, and with the Geometry Editor still active, import your modified OBJ to DS to create a morph. You do not have to be a PA to do that. I have made several morphs for PA dForce (strand-based) hair products that way. I have posted this in the forums a couple of times at least. You can even simulate in DS and export that and reimport it as a morph. The key is to have the Geometry Editor tool active during export and import. There can be millions of vertices in some of these hairs, so the morph creation can take some time.
This is a cool trick, never would have thought to try something like this. Thanks! Is there documentation on details of this or anything? What else can be done?
e: being able to make a few morph targets really would be great, e.g. with that particualr hair I love the way it looks from the front but not so much from the back. would be nice to be able to customize!
-
The dForce Hair Thread
Squishy said:
WendyLuvsCatz said:
maybe it should be called iray curves
they are just curves, the iray part comes in as the material applied to them. the geometry that make them up can be exported in OBJ format and taken into modeling apps (e.g Cinema, here) where you can see they're just splines. There is a little more going on, in that there's selection grouping that lets the artist set stuff like stiffness via point weights but it's not tied to the render engine.
unfortunately this is a one way operation, you can't get it back into D|S in this state without the proprietary import tool, you have to convert the splines to polys - roughly quadrupling the vertex count, which is already over a million verts just for this hair. if you ever wondered why this type of curve based hair feels so heavy to work with, yeah that's why (the G8 characters themselves are 16.5 thousand vertices)
With Geometry Editor tool active, you can export the "curves" hair, move the vertices in a modeler, and with the Geometry Editor still active, import your modified OBJ to DS to create a morph. You do not have to be a PA to do that. I have made several morphs for PA dForce (strand-based) hair products that way. I have posted this in the forums a couple of times at least. You can even simulate in DS and export that and reimport it as a morph. The key is to have the Geometry Editor tool active during export and import. There can be millions of vertices in some of these hairs, so the morph creation can take some time.
-
Morphs, textures, oh my. Variety needed
kyoto kid said:
...I live by morph and skin resource sets. As I've mentioned before I have an extensive library of them going back to G2. Two of the assets I use are Generation X2 and Zev0s XTransfer. Using both in sequence I can actually transfer G2 morphs and morph resources to G8. which further expands the resources I have available.
The same goes for hair as I have all of Slosh's UHT kits as well as a couple others which saves me a bundle on separate hair colour/texture add on content.
I also use Zev0's Skin Builder8 along with the Ultimate Iray Skin Manger by V3Digitimes to develop more variation in skin appearance (for example, someone who is very fair skinned with freckles or a realistic albino skin).
This is partially why I have not fully adopted G9 (save for unique characters by artists like RawArt that are pre-sculpted).as there are no conversion resources like this (likely due to the androgynous figure base) only ones for the existing base characters.
There are plenty of conversion options for G9. I even use X2 in my workflow to transfer ancient characters and morphs to G9. Plus - spoiler alert - most of the convertor products are nothing more than macros on things you can already do in studio.
-
Morphs, textures, oh my. Variety neededI must admit I don't use the morph resources for G8F as much as I could. I think I have found the range of the characters I want to play with now, and want to develop them largely as they are. They have been tweaked from their original form using the morph resources, and as such I'm not sure I could do the same customisation with G9 characters. For the type of images I do, I'm still unconvinced G9 adds anything new that's not also possible with G8 - or with a user updated V4, for that matter.
-
The dForce Hair Thread
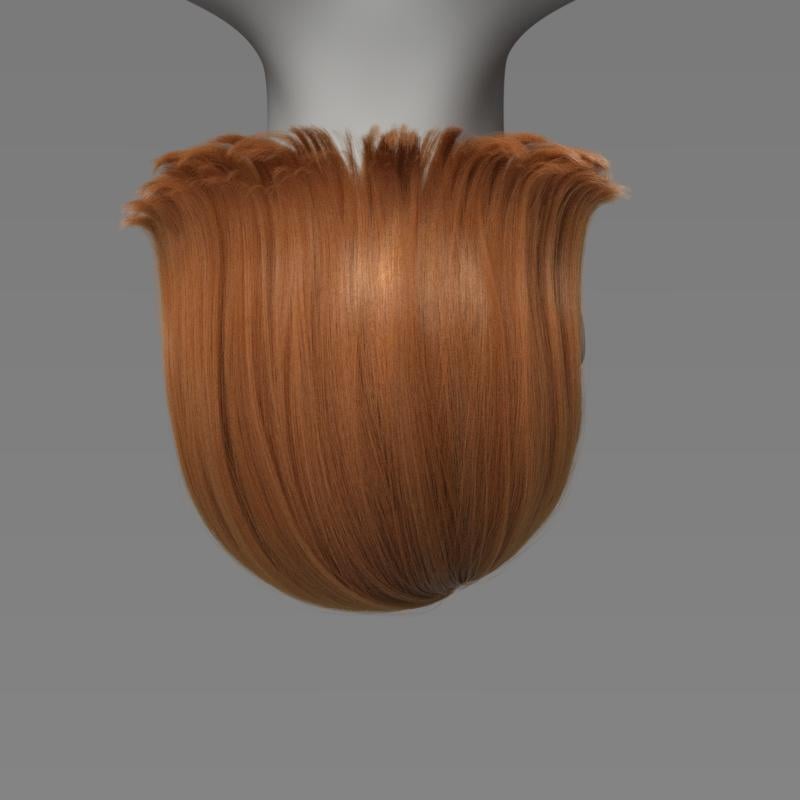
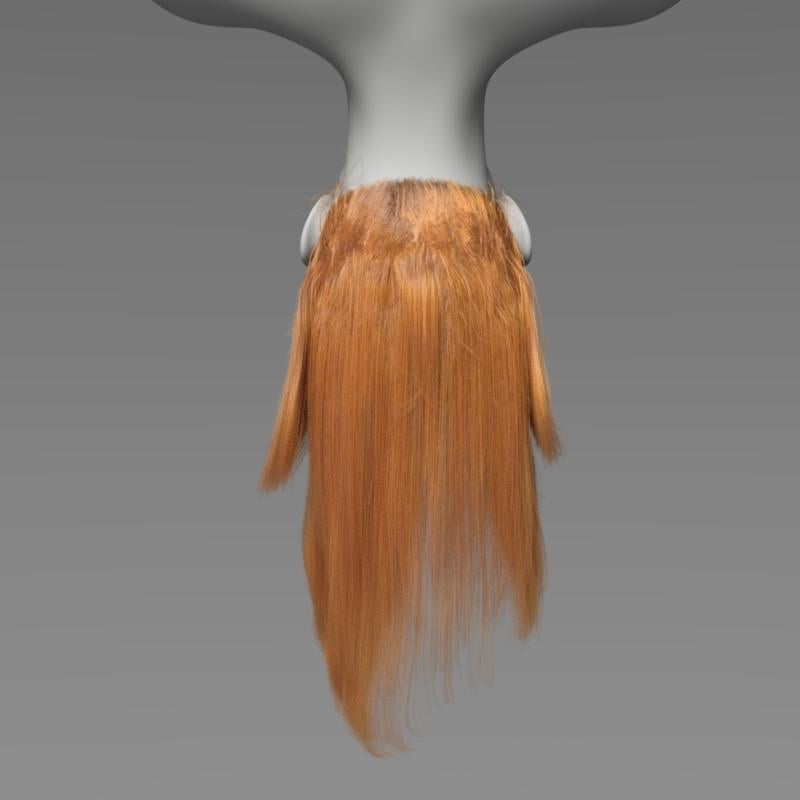
The most recent dForce hair I purchased is Toyen's dForce Linet Hair for Genesis 9. The attraction of that hair is that it is a simple style not overly puffy. It looks like a real person's hair.
Here is Linet Hair as loaded, before simulation:
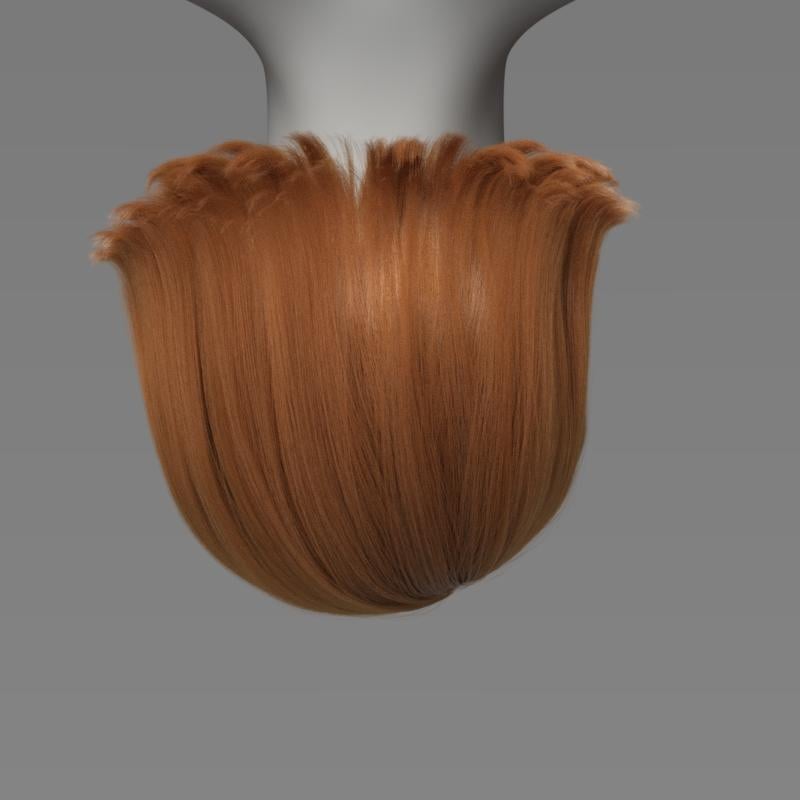
Here is Linet Hair after simulating with the simulation settings provided with the product. You can see that there is a slight movement due to the simulation.

Here is Linet Hair after simulating with G9's head, neck and torso tilted to the side - not much movement of the hair toward the side. (There is a wind left morph in the product, but I did not apply it here. This is just simulation results.)
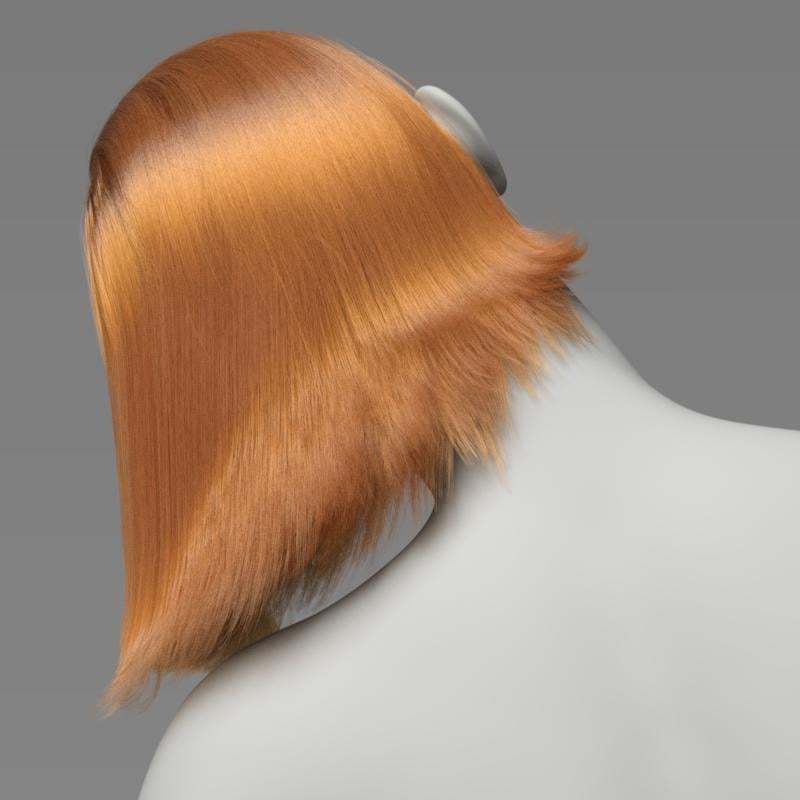
Here is Linet Hair after simulating with G9 upside down - not much movement toward the ground. Even setting gravity to 2 instead of 1 did not make much difference.
However, it is possible to change dForce parameters in the Surfaces pane to get more movement out of this hair. Lowering the Local Constraint strength is one parameter to experiment with. Changes to the Simulation Settings can also make a difference (gravity, subframe parameters, etc.) It takes experimentation. I tried lots of combinations.
Here is Linet Hair with changes to surface and simulation settings.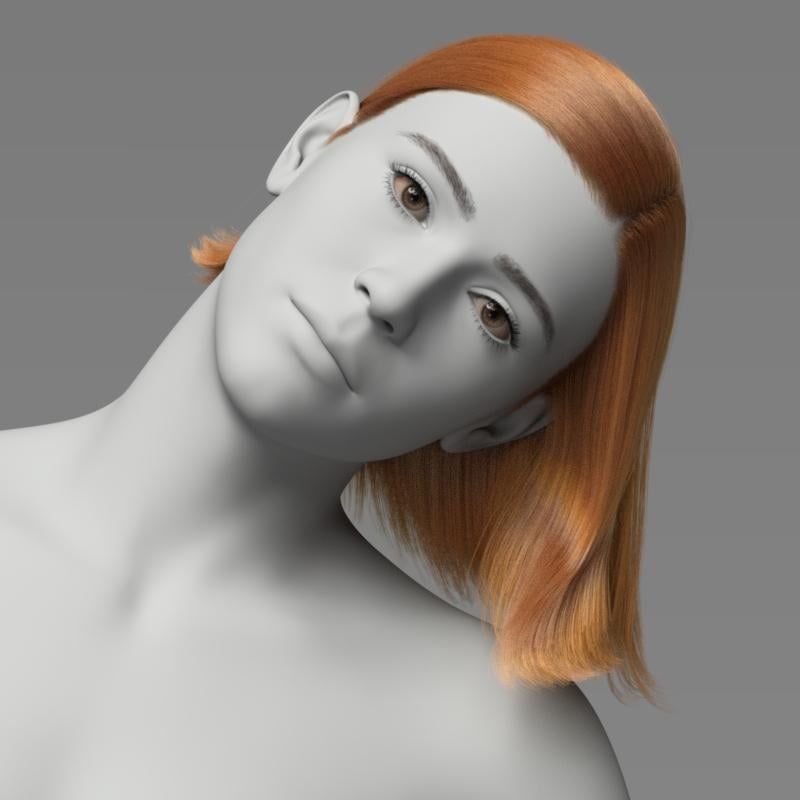
-
StickyChain - pose tool [Released]
jmucchiello said:
it remained relative to the figure wherever the figure was moved or rotated.
To position the chain, the plugin gets the global position of the StickyChain, which should be parent position + StickyChain's local translation(i.e. 0,0,0).
A test would be to select the Hand node in the Scene pane and see where it is in the Viewport pane. Then select the StickyChain node and see where it is in the Viewport pane. If the StickyChain's local translation is 0,0,0 then they should be the same position.
When ON the StickyChain should try to move the EndChain node to the same position as the StickyChain node, which if with 0,0,0 translation should be the hand node's position.
INFO NOTE: the StickyChain gets the Hand node's position not the mesh's position. The mesh attached to the Hand node can use a morph to put the mesh at a distance from its node position however, it is rare for that to be the significant distance as in your attachment. A morph could also be used to put the mesh of the chain nodes at a distance from their node positions however, again unlikely in your attachment. -
Diffeomorphic to Cascadeur?
Hi, is there any Diffeomorphic to Cascadeur workflow?
From Daz to Blender:
Using Genesis 9 imported into Blender via the Diffeomorphic plugin (Blender 4.2).From Blender to Cascadeur:
Exported the Daz rig into Cascadeur. (I also tried Convert to Rigify option in Diffeomorphic)
In Cascadeur, I ran "Generate Rig" after import.Export from Cascadeur:
I exported the whole scene in FBX (as suggested by the official tutorial).Problem:
After bringing the data back into Blender, the rig scale is completely wrong compared to the mesh.
(Mesh dimension is correct, but Rig dimension becomes tiny.)
And also, when I transfer the action(motion) in the rig from Cascadeur's to Blender's rig, most of the motion has gone.Has anyone experienced this?
Any advice on how to correctly export/import between Diffeomorphic and Cascadeur?Thanks a lot!


Daz 3D is part of 
Connect
DAZ Productions, Inc.
7533 S Center View Ct #4664
West Jordan, UT 84084
Licensing Agreement | Terms of Service | Privacy Policy | EULA
© 2025 Daz Productions Inc. All Rights Reserved.